
Saturday, January 30, 2016
Tuesday, January 26, 2016
A sink table
So we've been planning the outdoor kitchen for a while, and as part of that we want a barrel oven (eventually) and a place for convenient washing up. Thus, the idea of a sink table was born - a semi-mobile piece of outdoor furniture to make washing up a breeze. At least, more of a breeze than it is now with 5 people stuffed into my parents tiny motor home with one mini-sink.
We bought a sink from the tip ($10) - we wanted one with two sinks and two drainage boards, to make large batches of washing up easy.

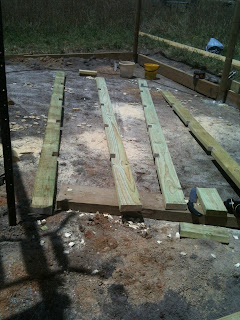
With some bits of timber we had already (also from the tip, around $15) Kyle made a frame for the sink to sit in.


Once we had the frame, and the sink was screwed on (with screws from the tip - $0.50) Kyle started on legs. First he checked that he had them all the right length, so the table would be level and not wobble (apparently harder than it sounds).

Because we want the table to be very sturdy, Kyle did mortice and tenon joints for the cross pieces at the base.


Once they were attached to the sink frame, he put another bar across the base as well. Notice the cut off corners - to avoid getting hurt by bashing your legs on the corner that would have stuck out.

Slats across the base will give it extra stability, and also provide a nice shelf that we can put some small plastic tubs in. This will be where we store cutlery and crockery between uses.

As a request from me, the ends of the big boards at the front and back of the sink frame were left on, and on one side Kyle added a little basket of slats that we can put bottles of detergent and so on in, and the other end there's extra space for plates to be put. There are also a few pieces of dowel across, as tea towel rails.

The front and back boards were painted, as they're most likely to get water on them. Then the whole thing got 3 or 4 coats of polyurethane.

Finally, the very bottom of the legs were capped with a bit of galvanised steel we had lying around to make them last longer. Kyle did up a template in cardboard first, and you can see that the corners are folded instead of cut so that water can't get in through an open corner.


I think the final thing is quite impressive, especially considering that the only part of it that isn't recycled from rubbish was the paint. Even the screws, nails and brackets were from the tip.

Once we have the outdoor kitchen structure finished this will find a semi-permanent home there, with piping underneath to take draining water away to a grey water mulch pit.
The whole thing cost maybe $30 to build, and perhaps $20 worth of paint to make it last longer (we didn't use a whole tin, which we'd bought for something else originally anyway, so hard to tell exactly how much). It took Kyle around 5 days worth of work to build and paint up, stretched into sessions a few hours long over the course of about a month.
We bought a sink from the tip ($10) - we wanted one with two sinks and two drainage boards, to make large batches of washing up easy.

With some bits of timber we had already (also from the tip, around $15) Kyle made a frame for the sink to sit in.

You can see the very technical numbering system that kept it all in the right place:


Once we had the frame, and the sink was screwed on (with screws from the tip - $0.50) Kyle started on legs. First he checked that he had them all the right length, so the table would be level and not wobble (apparently harder than it sounds).

Because we want the table to be very sturdy, Kyle did mortice and tenon joints for the cross pieces at the base.


Once they were attached to the sink frame, he put another bar across the base as well. Notice the cut off corners - to avoid getting hurt by bashing your legs on the corner that would have stuck out.

Slats across the base will give it extra stability, and also provide a nice shelf that we can put some small plastic tubs in. This will be where we store cutlery and crockery between uses.

As a request from me, the ends of the big boards at the front and back of the sink frame were left on, and on one side Kyle added a little basket of slats that we can put bottles of detergent and so on in, and the other end there's extra space for plates to be put. There are also a few pieces of dowel across, as tea towel rails.

The front and back boards were painted, as they're most likely to get water on them. Then the whole thing got 3 or 4 coats of polyurethane.

Finally, the very bottom of the legs were capped with a bit of galvanised steel we had lying around to make them last longer. Kyle did up a template in cardboard first, and you can see that the corners are folded instead of cut so that water can't get in through an open corner.


I think the final thing is quite impressive, especially considering that the only part of it that isn't recycled from rubbish was the paint. Even the screws, nails and brackets were from the tip.

Once we have the outdoor kitchen structure finished this will find a semi-permanent home there, with piping underneath to take draining water away to a grey water mulch pit.
The whole thing cost maybe $30 to build, and perhaps $20 worth of paint to make it last longer (we didn't use a whole tin, which we'd bought for something else originally anyway, so hard to tell exactly how much). It took Kyle around 5 days worth of work to build and paint up, stretched into sessions a few hours long over the course of about a month.
Outdoor Kitchen - part 2
(Part 1 here)
After the posts were concreted in Kyle mostly worked on finishing off the toilet block, while my parents and I worked on the kitchen structure.
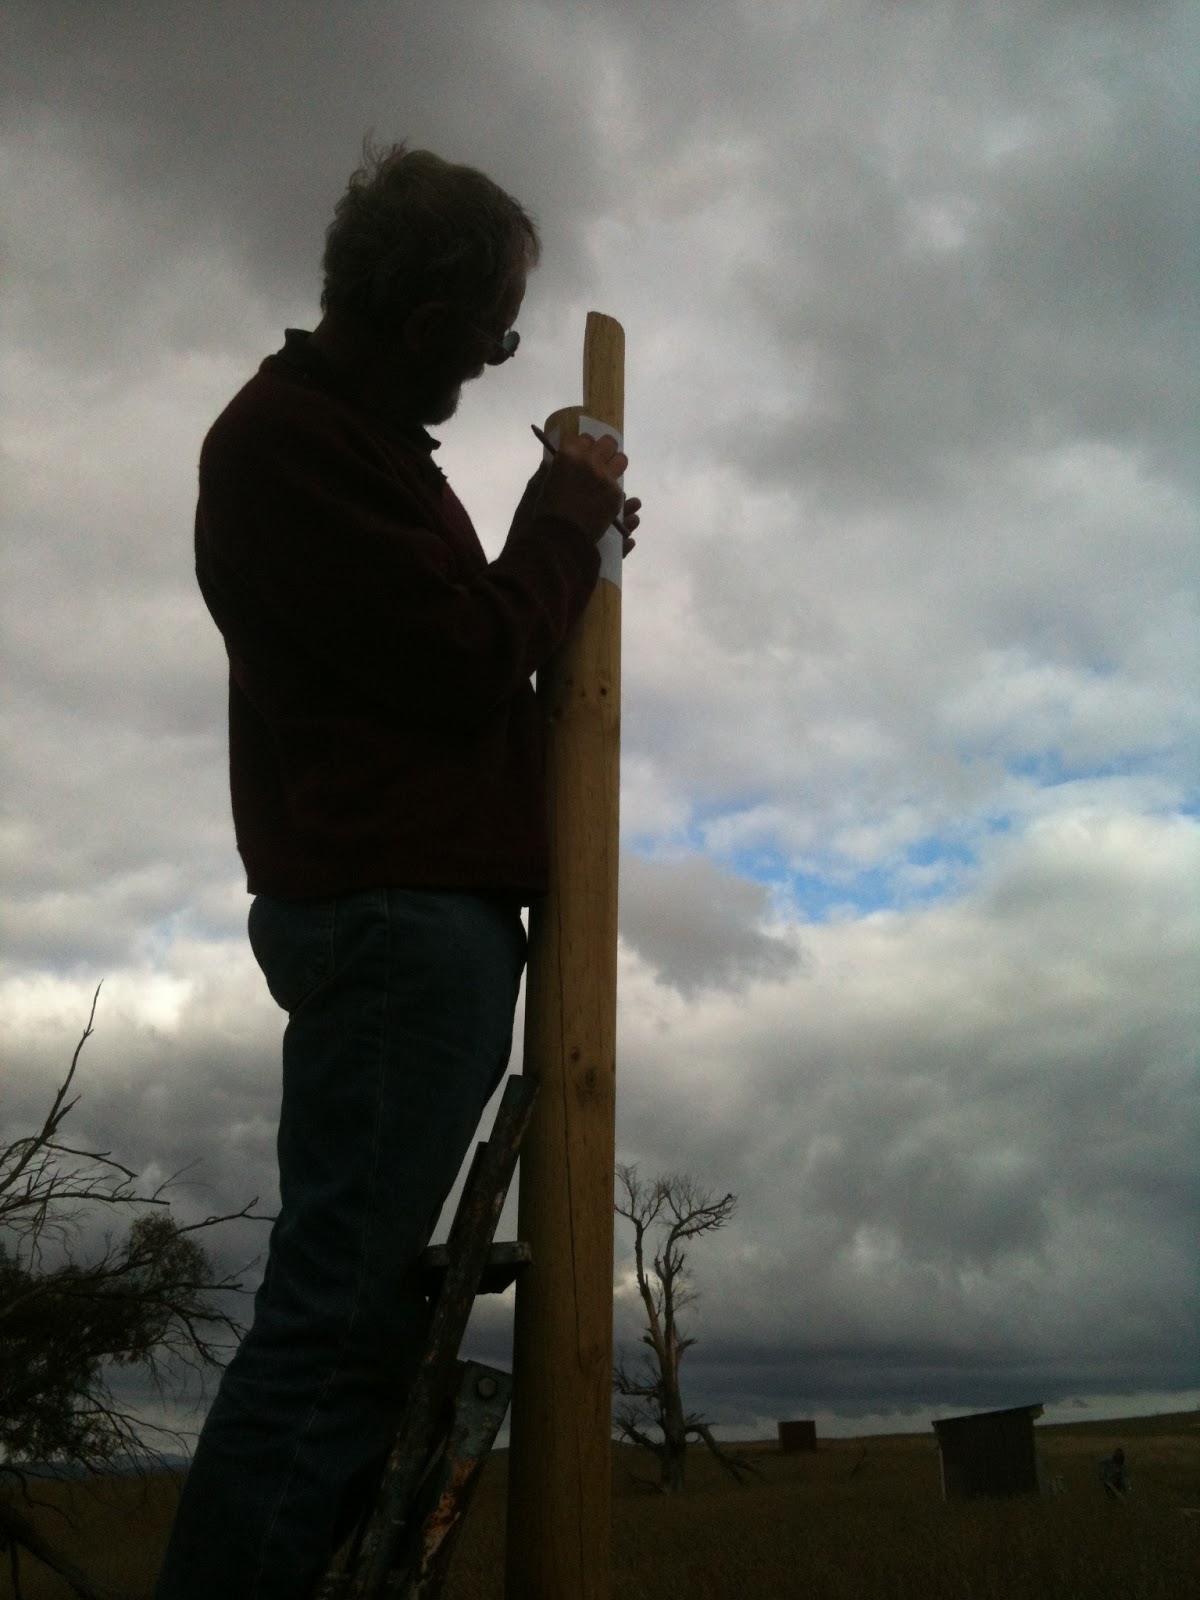
Dad and I raised the long beams with the help of some ladders. We did find, though, that Dad's careful measurements were a bit out, necessitating climbing up one of the posts and cutting a bit more off:

We clamped them to the ledges we'd cut out on the posts, then put a bolt through each one.

You can see below that the beam furthest from the camera is still a bit higher at one end compared to the one closest to the camera. We figured it wasn't enough to make a fuss about, and it will all work out close enough.

We clamped all of the short beams together, and Dad cut lap joints with a circular saw while I chiselled out all the uneven bits so the rafters would fit flush.
Because the roof is tilted (it has to be so rain will runoff) each beam needs to be angled slightly at the end so it will fit flush. They also needed a little wedge chiselled out so they'll fit into the U-brackets at a nice right angle.

It took 3 of us to raise the beams, though by the 4th one we were a bit more confident on the ladders and could do it with two of us.

You get into a routine after a while - lift the beam on one end, slide it into the U-bracket, lift the beam at the other end and rest it on the long beam. Things got interesting with the final knock into place - because there was a slight flex to the poles, and we were putting weight on from one side with the ladders, if we put the ladder in the middle of the building facing outwards as was most comfortable the long beams ended up too far apart and we couldn't get the short beam to hold. So we moved the ladders to the outside, but then they were too close and the beam didn't fit! So we put it in the bracket at one end, then one of us got down and leant against the poles on that side to give it a few more centimetres at the top so it would all fit.
Once we had all 5 beams in place and secure, Kyle exercised his ex-painter skills to raise some ladders and planks for us to fit the rafters.

Scaffolding like this looks dangerous at first, but it isn't really. It takes Kyle about half an hour to set up, checking that each ladder doesn't rock at all, and that each plank is stable and flat. There's quite an art to it, and I'm glad he has experience with it as more than once I've realised the seemingly hap-hazard placement of planks just happens to be exactly where is comfortable to have somewhere to put my feet given the structure we're working on.
I think Dad was skeptical at first, but he seemed to warm up to it.

We did the middle rafter first, as one of the beams was a little bowed. We measured carefully the distance between each beam at the ends, then marked the rafter in those places so that when we fit it into the lap joint we could use it to adjust the beam to make it straight again. Each lap joint got glued, clamped, and nailed.

When you finish something like this, it necessitates selfies from the top of the scaffolding.
The point where short beams attached to the long beams we put nail plates over the top. This way, any force pulling the beams apart puts the nails under shear instead of just pulling them out of the wood. We also stuck nail plates over the lap joints at the end of each rafter, because we had some left over and why not?

Getting the whole frame up took us the better part of 3 days, spread out over more than that due to weather and other commitments. A day of concreting, a day of beams and cutting, a day of rafters. Don't be fooled into thinking you can do it much quicker than that - at first, with this project, I would get so frustrated at how slow everything went, but I've learned to be more realistic with time.
After this, we put corrugated metal roofing on (second hand from the tip, I think it was originally colourbond fencing). Each row took us a few hours, separated over several days because of the weather and having to move the scaffolding in between.

As I write this we have the second of 3 rows up (though only one is pictured here), but have had to take a break due to rain. While Kyle and I return to Canberra for the working week, my parents have said they'll finish levelling the ground under the structure and fill to the edges of the retaining wall (something we'd left undone until now as we needed more drain pipe).
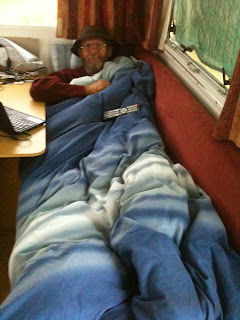
Finally, after all this hard work, one needs a bit of a rest...
After the posts were concreted in Kyle mostly worked on finishing off the toilet block, while my parents and I worked on the kitchen structure.
Dad and I raised the long beams with the help of some ladders. We did find, though, that Dad's careful measurements were a bit out, necessitating climbing up one of the posts and cutting a bit more off:
We clamped them to the ledges we'd cut out on the posts, then put a bolt through each one.

You can see below that the beam furthest from the camera is still a bit higher at one end compared to the one closest to the camera. We figured it wasn't enough to make a fuss about, and it will all work out close enough.

We clamped all of the short beams together, and Dad cut lap joints with a circular saw while I chiselled out all the uneven bits so the rafters would fit flush.

Because the roof is tilted (it has to be so rain will runoff) each beam needs to be angled slightly at the end so it will fit flush. They also needed a little wedge chiselled out so they'll fit into the U-brackets at a nice right angle.

It took 3 of us to raise the beams, though by the 4th one we were a bit more confident on the ladders and could do it with two of us.

You get into a routine after a while - lift the beam on one end, slide it into the U-bracket, lift the beam at the other end and rest it on the long beam. Things got interesting with the final knock into place - because there was a slight flex to the poles, and we were putting weight on from one side with the ladders, if we put the ladder in the middle of the building facing outwards as was most comfortable the long beams ended up too far apart and we couldn't get the short beam to hold. So we moved the ladders to the outside, but then they were too close and the beam didn't fit! So we put it in the bracket at one end, then one of us got down and leant against the poles on that side to give it a few more centimetres at the top so it would all fit.
Once we had all 5 beams in place and secure, Kyle exercised his ex-painter skills to raise some ladders and planks for us to fit the rafters.
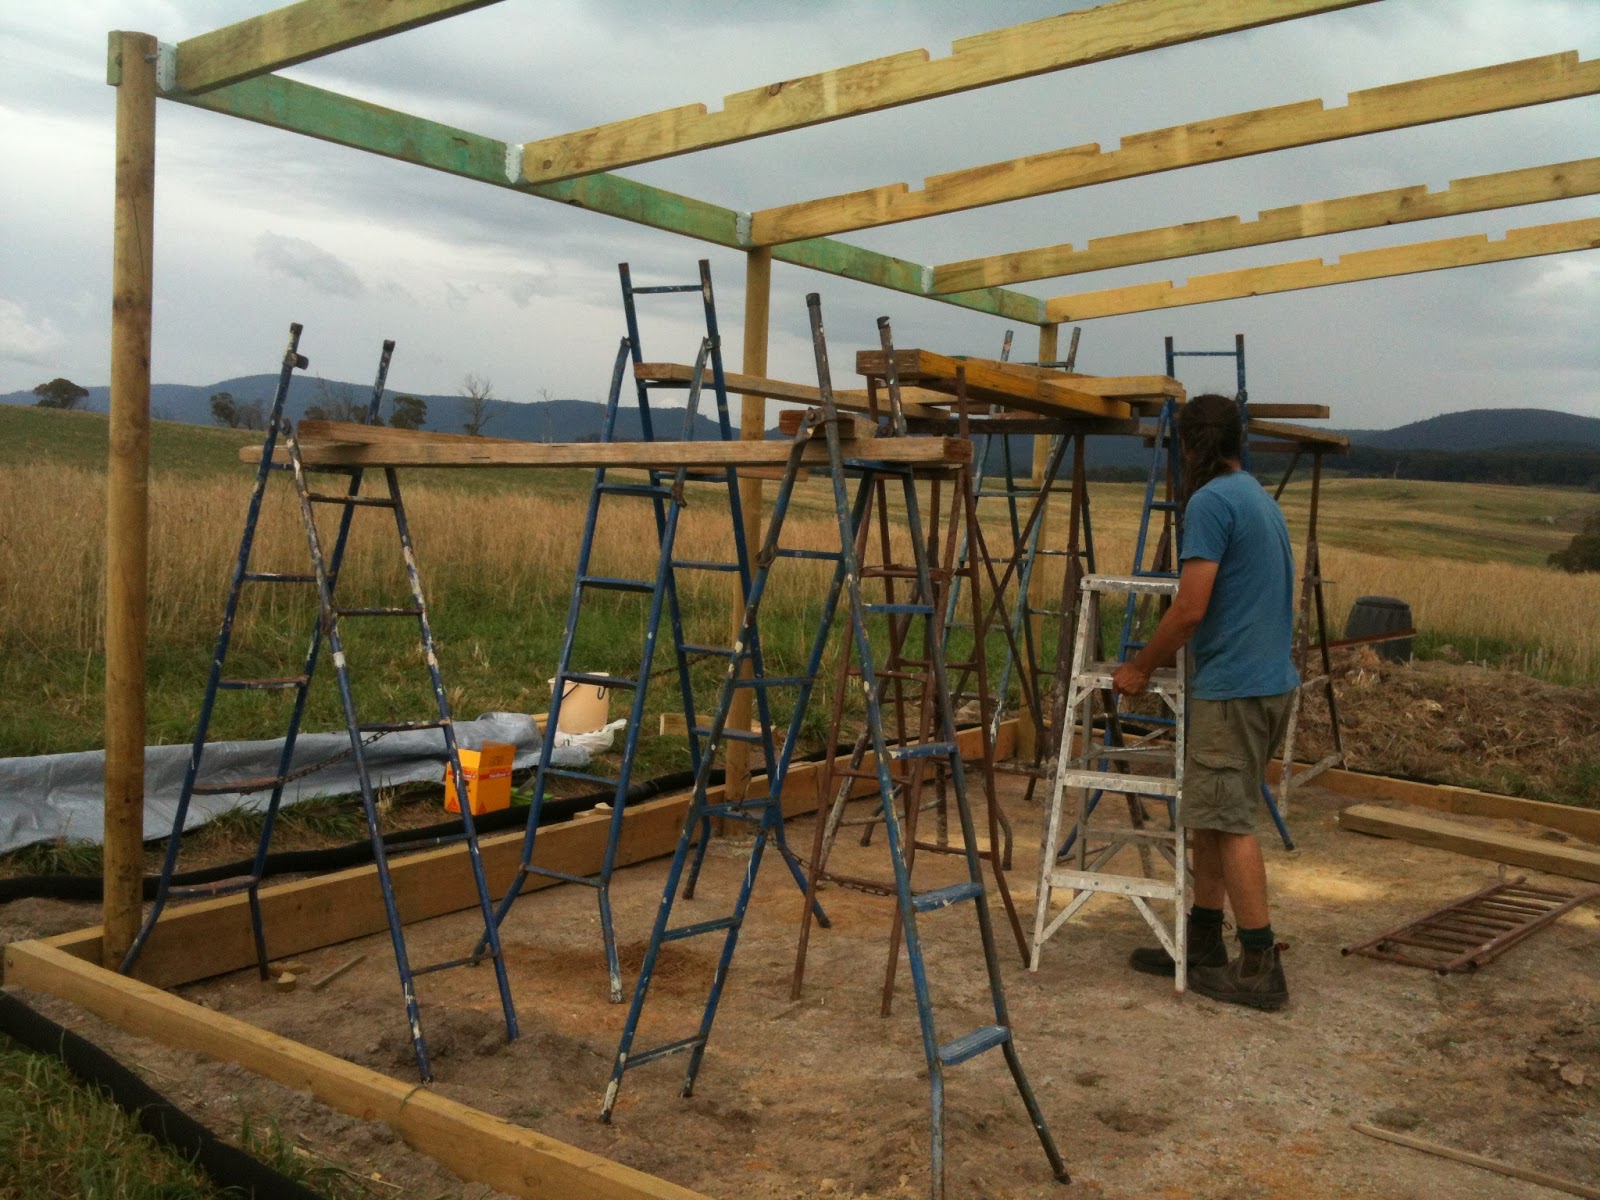
Scaffolding like this looks dangerous at first, but it isn't really. It takes Kyle about half an hour to set up, checking that each ladder doesn't rock at all, and that each plank is stable and flat. There's quite an art to it, and I'm glad he has experience with it as more than once I've realised the seemingly hap-hazard placement of planks just happens to be exactly where is comfortable to have somewhere to put my feet given the structure we're working on.
I think Dad was skeptical at first, but he seemed to warm up to it.

We did the middle rafter first, as one of the beams was a little bowed. We measured carefully the distance between each beam at the ends, then marked the rafter in those places so that when we fit it into the lap joint we could use it to adjust the beam to make it straight again. Each lap joint got glued, clamped, and nailed.

When you finish something like this, it necessitates selfies from the top of the scaffolding.
The point where short beams attached to the long beams we put nail plates over the top. This way, any force pulling the beams apart puts the nails under shear instead of just pulling them out of the wood. We also stuck nail plates over the lap joints at the end of each rafter, because we had some left over and why not?

Getting the whole frame up took us the better part of 3 days, spread out over more than that due to weather and other commitments. A day of concreting, a day of beams and cutting, a day of rafters. Don't be fooled into thinking you can do it much quicker than that - at first, with this project, I would get so frustrated at how slow everything went, but I've learned to be more realistic with time.
After this, we put corrugated metal roofing on (second hand from the tip, I think it was originally colourbond fencing). Each row took us a few hours, separated over several days because of the weather and having to move the scaffolding in between.

As I write this we have the second of 3 rows up (though only one is pictured here), but have had to take a break due to rain. While Kyle and I return to Canberra for the working week, my parents have said they'll finish levelling the ground under the structure and fill to the edges of the retaining wall (something we'd left undone until now as we needed more drain pipe).
Finally, after all this hard work, one needs a bit of a rest...

(Dad, tucked in on the couch in the motor home)
Wednesday, January 20, 2016
Sometimes, tip finds have unintended consequences
We've found some pretty random stuff at the local tip shop over the last few years. It's become our favourite place. Most of the people who work there know us now, and have some idea of what we're doing. We're sure we aren't the only ones, but it's a nice sort of atmosphere.
We've bought a stack of timber...

Tiles...

Pavers...

Loads of barbed wire...

Kyle found an old leather punching bag - I don't think he plans to use it, he just likes how it looks...

But the weirdest one yet was this piece of timber...

It's almost 2m long, just less than 1m wide, and about 10cm thick. It has a little rot on the other side, but we're not too worried as it's just the heartwood that's crumbled. We're not exactly sure, but as it took 4 people and a forklift to get it into our van we think it weighs somewhere between 200 and 300kg. Three of us got it out ok (Kyle and I mostly, but assisted by my sister Rachael), because we drove the van right up to the shipping container and just sort of pushed it along the ground on it's side. I'm not really sure how we're going to get it to wherever we're going to use it.
To give you some idea, though, it was a bit of a wet day when we took it to the property, and we weren't paying close enough attention, so we ended up getting bogged when we first arrived. After much messing around with bricks and timber offcuts trying to un-bog ourselves...

... eventually we had the bright idea of taking the big lump of timber out of the back, and all of a sudden we weren't bogged anymore!
Friday, January 15, 2016
Outdoor kitchen - part 1
We wanted a large, covered area that we can use as an outdoor kitchen during our build. This will become an entertaining space later on, and is a great water collection surface. We'd done up rough plans, and had a few chats with my folks about it, but at the time Kyle and I were really focused on getting the toilet block finished.
Apparently, when you tell your Dad "jeez, I'd really like an outdoor kitchen..." you come back 3 days later to cleared and leveled ground, two retaining walls, and 6 post holes.
We thought we should catch up at that point and buy the timber for the structure, so we let him loose on the maths of putting it all together. There was much discussion about dimensions (6m x 4m, determined by the size of readily available timber) and how many beams/rafters to have, during which we scribbled madly trying to end up with a common vision for how it would fit together.

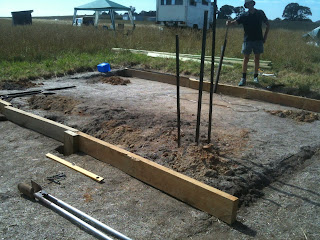
After clearing the grass, Dad levelled the site with the help of two stakes, 10m of clear plastic tubing and some potassium permanganate (makes the water level easier to see - you can usually get it at a pharmacy).

He tells me that each of the post holes is within 1cm of the depth of each of the others. He was a bit grumpy when we insisted he put some gravel in the bottom first, saying it messed up his measurements.
Because of the slope we'll have a short retaining wall at the top and bottom of the structure. We had the sleepers already (we bought about 35 of them cheap and used some for roof beams in the toilet block), so that was an easy fix. The structure is set up so that the posts will form part of the supports for the retaining walls, but because of the length of the sleepers this isn't quite sufficient so we had a few shorter sleepers to hold the rest of it up. The bolts came with the sleepers when we bought them, so again a neat solution.

The bottom of each hole has a few inches of gravel and some sand we dug up from the creek bank, just enough to lift the posts out of the soil before we put some quickset concrete around the base. After much debate, we used rounded poles instead of square ones. Kyle tells me you can't get square ones that are treated better than H3 (at least, we couldn't get them), and since these are going in the ground we wanted to be thorough. We weren't as careful with the toilet block posts (we're still learning), so I guess over the next 20 years we'll see the difference. In reality, I suspect longevity has a lot more to do with drainage and not letting water sit at the base of the posts. We contemplated using metal stirrups and decided it was too hard to get them in exactly the right spot - we'll tackle that one on some other project I imagine.
After that, Dad cut ledges in the top of each posts, and on a fine day Kyle went out and helped concrete them while I was at work.


You'll notice here that the posts on the downhill side are a bit taller than the posts on the uphill side. There was considerable discussion over which way to slope the roof - my parents argued for sloping it against the hill to maximise the view, whereas Kyle and I are practical people and were much more concerned about rain and sun getting in. Eventually we decided on the former, as it makes the hookup to the eventual water tank a bit easier.
We'll wait a few days until the concrete is really set before adding the beams. Dad did admit at one point that his precision measurements probably wouldn't hold up to reality, so we made sure we bought cross beams that were a little longer than the intended measurements (4.2m rather than 4m) so we could cut them to fit if we messed up elsewhere. Also, as they are at an angle they need to be slightly longer than 4m anyway to reach.
Apparently, when you tell your Dad "jeez, I'd really like an outdoor kitchen..." you come back 3 days later to cleared and leveled ground, two retaining walls, and 6 post holes.

We thought we should catch up at that point and buy the timber for the structure, so we let him loose on the maths of putting it all together. There was much discussion about dimensions (6m x 4m, determined by the size of readily available timber) and how many beams/rafters to have, during which we scribbled madly trying to end up with a common vision for how it would fit together.

After clearing the grass, Dad levelled the site with the help of two stakes, 10m of clear plastic tubing and some potassium permanganate (makes the water level easier to see - you can usually get it at a pharmacy).

He tells me that each of the post holes is within 1cm of the depth of each of the others. He was a bit grumpy when we insisted he put some gravel in the bottom first, saying it messed up his measurements.
Because of the slope we'll have a short retaining wall at the top and bottom of the structure. We had the sleepers already (we bought about 35 of them cheap and used some for roof beams in the toilet block), so that was an easy fix. The structure is set up so that the posts will form part of the supports for the retaining walls, but because of the length of the sleepers this isn't quite sufficient so we had a few shorter sleepers to hold the rest of it up. The bolts came with the sleepers when we bought them, so again a neat solution.

The bottom of each hole has a few inches of gravel and some sand we dug up from the creek bank, just enough to lift the posts out of the soil before we put some quickset concrete around the base. After much debate, we used rounded poles instead of square ones. Kyle tells me you can't get square ones that are treated better than H3 (at least, we couldn't get them), and since these are going in the ground we wanted to be thorough. We weren't as careful with the toilet block posts (we're still learning), so I guess over the next 20 years we'll see the difference. In reality, I suspect longevity has a lot more to do with drainage and not letting water sit at the base of the posts. We contemplated using metal stirrups and decided it was too hard to get them in exactly the right spot - we'll tackle that one on some other project I imagine.
After that, Dad cut ledges in the top of each posts, and on a fine day Kyle went out and helped concrete them while I was at work.


You'll notice here that the posts on the downhill side are a bit taller than the posts on the uphill side. There was considerable discussion over which way to slope the roof - my parents argued for sloping it against the hill to maximise the view, whereas Kyle and I are practical people and were much more concerned about rain and sun getting in. Eventually we decided on the former, as it makes the hookup to the eventual water tank a bit easier.
We'll wait a few days until the concrete is really set before adding the beams. Dad did admit at one point that his precision measurements probably wouldn't hold up to reality, so we made sure we bought cross beams that were a little longer than the intended measurements (4.2m rather than 4m) so we could cut them to fit if we messed up elsewhere. Also, as they are at an angle they need to be slightly longer than 4m anyway to reach.
Thursday, January 14, 2016
It's nice to have help
Sometimes when I tell people what we're doing with our house they look a bit concerned and ask if we have much experience with that kind of thing, as though it's utterly impossible for regular people to do anything outside the norm. When I say not really they generally judge my sanity a little, and I assume they think we'll come crashing and burning at some stage and see the error of our ways.
I look at it differently - I come by such insanity quite honestly. My parents, in one of their loopier moments, built a 4WD motor home from scratch, test drove it around Australia for 6 months, then decided to drive to Scotland in back for my cousin's wedding. After watching that unfold, building ones own house that's perfectly stationary doesn't seem so far fetched. I'm sure my Dad would be quite pleased by this.
Of course, there are other bonuses. When you tell such parents you're building a house using an unusual technique, they simply can't resist coming to have a poke around for a few months. So we now have a self-sufficient motor home in residence on the property, which brings with it all manner of conveniences such as an induction stove and a vacuum pump loo, not to mention two enthusiastic helpers!

It's turning into a rather eclectic settlement, as our tent (the red and white one on the left) hails back to our days in historical reenactment and is a replica of viking tents during the 8th/9th century.
Composting toilet block - part 2
See part 1 here.
Once we had all 9 posts set...

... we added a few more cross pieces to hold it all steady (there was a bit of give in the posts)...

... then started on the roof beams. These were braced with right angle brackets to hold them in place. We arranged them so we had a little bit more roof over the front, where the doors will be. The slope of the roof follows the slope of the hill, which is nice and convenient as then all our posts could be the same length and achieve a nice even slope quite easily.

Then we put in 4 rafters. This involved a lot of sawing and chiselling out of the joints, something Kyle was good at to start with and I like to think I got progressively better at with time.

The rafters were nailed in, and had brackets as well. Our site is quite windy, so we went to the effort to make this really super sturdy so that once it has the cladding on it won't blow around.
Then we painted the whole thing. Kyle used to be a painter/decorator, and is very keen to tell me terrible tales of what happens when people don't paint things properly (it rots). Since we've put a fair bit of effort into our toilet block, we want the additional longevity the paint will give the wood. The paint was cheap at the local hardware store as it had been mixed up to the wrong colour - the people there keep a shelf of mis-mixes for cheaps, and since we didn't really care what colour it was going to be this suited us well.

We were interrupted for quite a while here as the spring rains, pushed along a bit by an apparently extreme La Nina event, just kept coming every weekend we tried to go out there. We even bogged our van one time when we got a bit overconfident on the grassy hillside. We are now pro's at unbogging vans.
Eventually the rain cleared up enough to get the roof on...

... and the walls...


Kyle started panelling the inside with timber offcuts we had collected from the tip over the last few years. I quite like the random, rustic feel of it. The panelling stops all the radiant heat from the metal making the whole place an oven in summer.

Then we went to the tip to get doors. Hanging these was a bit of a team effort, as one of them is officially the heaviest door on the face of the planet.

You'll notice there's a gap in the wall panelling at the top on the back. Since this is the northern side it gets a lot of light so we put a window there! I took polycarbonate sheeting and bent it around the end of the rafters. There's a piece of window ledging underneath, and Kyle put proper window glazing on the lower sill edge so it won't leak in the rain.

At the time of writing this we've gotten a little further and are almost completely done, but I'll put that in a separate post as getting the seats right was a bit technical.
Subscribe to:
Posts (Atom)