So quite some time ago we decided to build a barrel oven, all the better to feed ourselves with whilst building which had become more of a challenge as more people got involved. I found it quite difficult to find anything approaching a detailed account of how to build a barrel oven. Lots of stories, very light on the specifics. I have the barrel ovens book from Firespeaking, which is quite thorough on how to do the brickwork, and found a few blog posts about the interwebs that helped. Most useful is probably this one, but it doesn't mention measurements or anything. There wasn't anywhere that could tell us in detail how to do the metalwork (mostly people just say "give some pictures to your local backyard welder dude" but since that's us we had to work it out), so we just sort of went for it, trying to think it through logically and come up with something that looked like it would work pretty good. We figured we might as well document what we did so that someone else can follow this for some tips and not have to work it out from scratch like we did.
I sketched up the parts based mostly on these two images:

 Then I worked out the measurements based on a 55 gallon drum we bought at the tip, as everything had to fit around that. The front of the barrel will be flush with the front of the whole oven, and the front of the ash grate will be too, we want the outside of the ash grate to be about the same length as the barrel.
For the width, I figure it's best to judge this from the size of the bricks we're likely to be able to use to build the oven and make that + a mortar gap equivalent to the inside edge of the ash grate so that it can rest on the brickwork. This presents us with a problem as we haven't got them yet but would still like to begin the metalwork. Apparently the length of a standard brick is 22.5mm (again, trusty Wikipedia), and since the consequences of getting this bit wrong are that we'll spend a bit of extra time cutting bricks to size or getting creative with how we lay them it seems fair enough to run with that number.
I put these measurements together with my sketches and produced a cut list for Kyle and Baz (our handy blacksmith friend who's also good with a welder).
We ended up buying new metal as it was a lot quicker than accumulating tip shop offcuts and we had a long weekend we wanted to get it all done in. Cost us about $250 all up, and we had all the welding gear already between the three of us. The metal shop could have done most of the cutting for us, but they were a bit busy so it would have taken them three days and we wanted to get it done over the weekend. And so commenced the Long Weekend Weldathon of 2018.
Starting with the Ash Drawer we added a couple of little bits of angle iron in the corners to stabilise the structure as we were only using 2mm plate. All the welds went on the inside so it would sit flush against the brickwork. The welder was new (well, new to us) so there was a fair bit of trial and error and complaints about dodgy welds before they were happy with it.


We left a 10mm lip around the edge of the front of the drawer, and Baz is going to use his Mad Blacksmithy Skillz to make a handle out of offcuts a bit later on. I don't think the boys welded all the way along, just tacked down an inch or so every so at regular intervals along the edges. The drawer took maybe 3 hours all up, including all the setup, cutting and finishing.
Next came the Ash Grate, dimensions of which are based entirely on the drawer (the idea is that ash will drop through the grate into the drawer, but the burning wood stays on top). We had many extensive discussions about how far apart the bars should be and eventually settled on 10mm rod with 20mm between, after consulting many internet images and painstakingly counting how many bars they had. The grate took about 2 hours, and most of that was cutting and getting it all square.


Next came the Firebox Door, slightly more complicated but still pretty straight forward. We did an angle iron frame for the door frame, then a smaller angle iron frame around the edge of the door itself, and a strip of flat bar for the latch mechanism. The boys did something fancy (well, they thought it was fancy) with the hinges to get it all to open and close smoothly, but I was out getting insulation at the time they worked that out so I'm not entirely sure how it all worked.


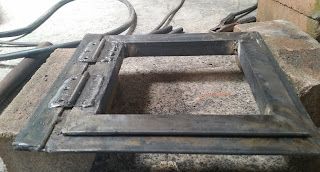

Again, handle and latch from random offcuts a bit later on. One thing I noticed in some of the pictures I found was that there's a small piece of metal rod at a diagonal connecting the firebox door and the ash grate, to hold the door frame in place. This seemed like a pretty good idea to us, but for ease of storage in the mean time we'll only add that when we go to actually build the thing. That way we can also adjust bits as needed while we set the bricks around each part.
We tackled the Shelves next. I figured the mesurements after messing around with a tapemeasure up against the end of the barrel for a while and seeing what looked about right. After finding it almost impossible to find steel mesh that wasn't either painted or galvanised we went with the lesser of two evils and then vinegar-washed the galv off. We couldn't find a wash tray big enough so I made one with duct tape and corflute and lined it with a sheet of clear plastic so it wouldn't leak. I think we added a bit of hydrochloric acid at one point too because we got tired of waiting for the vinegar to work and didn't have time to leave it all night.

We strengthened the mesh with 10mm steel rod all around the edges, and another across the middle, so the shelves would stay flat rather than sagging over time.
The Racking for the shelves was the only part where measurements became a bit more important, in the sense that every other part once we cut things to length it just had to all go together, whereas with the racking we had to weld it at a particular spot. This is so that when the oven is eventually built the shelves sit perfectly level and our cakes don't end up wonky or spilling out. This was pretty fiddly, and was achieved mostly through meticulous use of calipers and squares. The distance between each of the uprights was determined by the rippling on the edge of the barrel, so anyone using a slightly different barrel to ours will have very different m


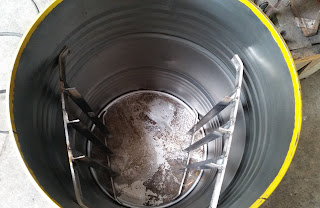
Finally, cleaning the barrel out was the topic of many discussions and an awful lot of messiness. We did search high and low for a place that would sell us a fresh new one, but the conclusion was that unless we wanted 1000 of them no one would even talk to us, so we had to clean out a used one we found at the tip. Eventually we cut off the end (with a chisel, a bit like a can opener) and Kyle scrubbed it several times with methylated spirts, then several more times with warm water that had super concentrated detergent in it. Kyle had to kind of climb inside it with each rinse (strongly recommend very good breathing equipment for this part, even the detergent stage). It seemed to work pretty well, but we'll be very careful the first time we fire the whole thing up anyway.

We bolted the racking to the inside of the barrel, which was the other part of the whole operation that really had to be totally meticulously perfect (to achieve level shelves) then done! Levelling the racking was a multiple-person job involving several spirit levels and a lot of swearing. I don't have good tips for this because I'm pretty convinced the way we did it wasn't very effective, though if you're in the mood it did occur to us later on that if we'd sat the barrel up vertically we could have done it off a plumb level rather than tried to hold the whole thing flat.
The last part of welding was the Oven Door, which we did last because we weren't quite sure how it was all going to work. This bit took quite a while to work out, so deserves a post all of its own, in Part 2.
I sketched up the parts based mostly on these two images:
For the width, I figure it's best to judge this from the size of the bricks we're likely to be able to use to build the oven and make that + a mortar gap equivalent to the inside edge of the ash grate so that it can rest on the brickwork. This presents us with a problem as we haven't got them yet but would still like to begin the metalwork. Apparently the length of a standard brick is 22.5mm (again, trusty Wikipedia), and since the consequences of getting this bit wrong are that we'll spend a bit of extra time cutting bricks to size or getting creative with how we lay them it seems fair enough to run with that number.
I put these measurements together with my sketches and produced a cut list for Kyle and Baz (our handy blacksmith friend who's also good with a welder).
We ended up buying new metal as it was a lot quicker than accumulating tip shop offcuts and we had a long weekend we wanted to get it all done in. Cost us about $250 all up, and we had all the welding gear already between the three of us. The metal shop could have done most of the cutting for us, but they were a bit busy so it would have taken them three days and we wanted to get it done over the weekend. And so commenced the Long Weekend Weldathon of 2018.
Starting with the Ash Drawer we added a couple of little bits of angle iron in the corners to stabilise the structure as we were only using 2mm plate. All the welds went on the inside so it would sit flush against the brickwork. The welder was new (well, new to us) so there was a fair bit of trial and error and complaints about dodgy welds before they were happy with it.


We left a 10mm lip around the edge of the front of the drawer, and Baz is going to use his Mad Blacksmithy Skillz to make a handle out of offcuts a bit later on. I don't think the boys welded all the way along, just tacked down an inch or so every so at regular intervals along the edges. The drawer took maybe 3 hours all up, including all the setup, cutting and finishing.
Next came the Ash Grate, dimensions of which are based entirely on the drawer (the idea is that ash will drop through the grate into the drawer, but the burning wood stays on top). We had many extensive discussions about how far apart the bars should be and eventually settled on 10mm rod with 20mm between, after consulting many internet images and painstakingly counting how many bars they had. The grate took about 2 hours, and most of that was cutting and getting it all square.


Next came the Firebox Door, slightly more complicated but still pretty straight forward. We did an angle iron frame for the door frame, then a smaller angle iron frame around the edge of the door itself, and a strip of flat bar for the latch mechanism. The boys did something fancy (well, they thought it was fancy) with the hinges to get it all to open and close smoothly, but I was out getting insulation at the time they worked that out so I'm not entirely sure how it all worked.


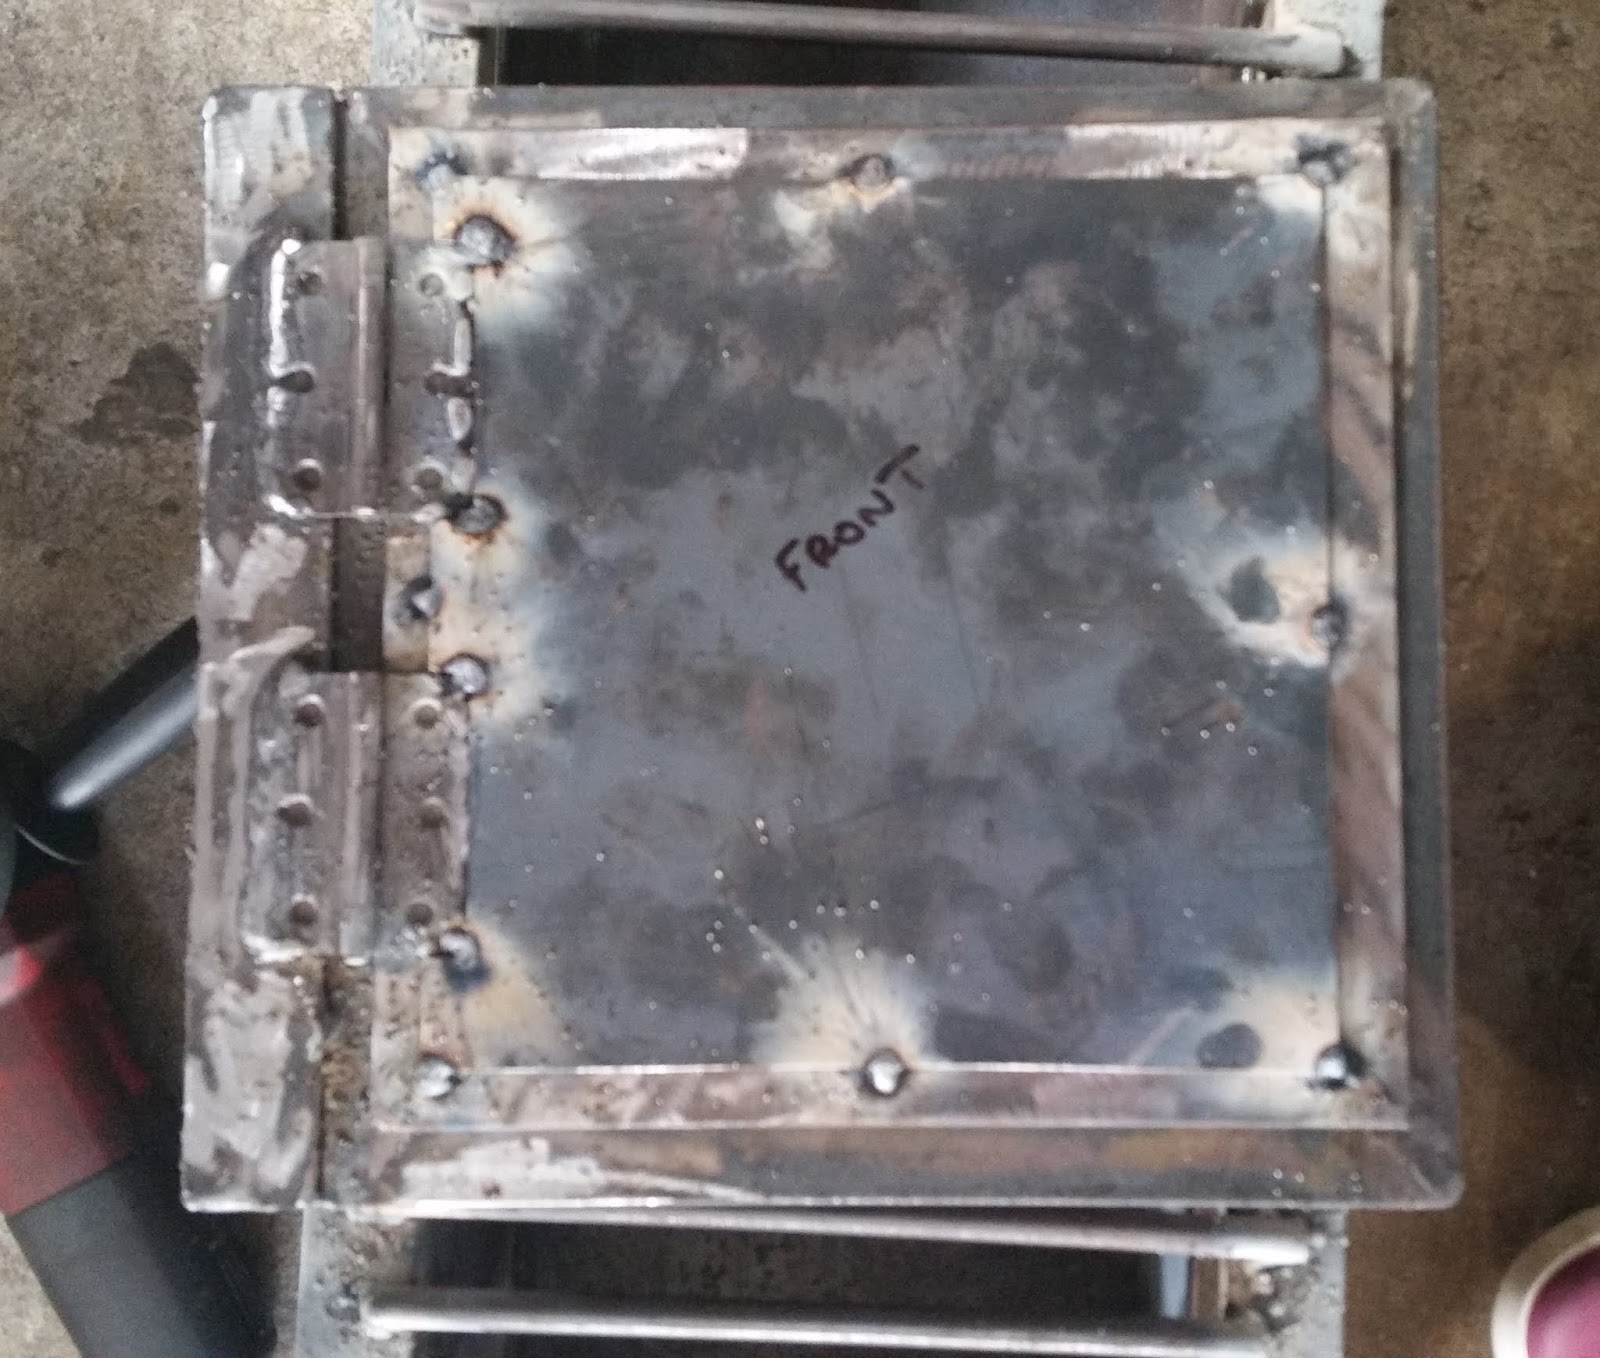
Again, handle and latch from random offcuts a bit later on. One thing I noticed in some of the pictures I found was that there's a small piece of metal rod at a diagonal connecting the firebox door and the ash grate, to hold the door frame in place. This seemed like a pretty good idea to us, but for ease of storage in the mean time we'll only add that when we go to actually build the thing. That way we can also adjust bits as needed while we set the bricks around each part.
We tackled the Shelves next. I figured the mesurements after messing around with a tapemeasure up against the end of the barrel for a while and seeing what looked about right. After finding it almost impossible to find steel mesh that wasn't either painted or galvanised we went with the lesser of two evils and then vinegar-washed the galv off. We couldn't find a wash tray big enough so I made one with duct tape and corflute and lined it with a sheet of clear plastic so it wouldn't leak. I think we added a bit of hydrochloric acid at one point too because we got tired of waiting for the vinegar to work and didn't have time to leave it all night.

We strengthened the mesh with 10mm steel rod all around the edges, and another across the middle, so the shelves would stay flat rather than sagging over time.
The Racking for the shelves was the only part where measurements became a bit more important, in the sense that every other part once we cut things to length it just had to all go together, whereas with the racking we had to weld it at a particular spot. This is so that when the oven is eventually built the shelves sit perfectly level and our cakes don't end up wonky or spilling out. This was pretty fiddly, and was achieved mostly through meticulous use of calipers and squares. The distance between each of the uprights was determined by the rippling on the edge of the barrel, so anyone using a slightly different barrel to ours will have very different m


Finally, cleaning the barrel out was the topic of many discussions and an awful lot of messiness. We did search high and low for a place that would sell us a fresh new one, but the conclusion was that unless we wanted 1000 of them no one would even talk to us, so we had to clean out a used one we found at the tip. Eventually we cut off the end (with a chisel, a bit like a can opener) and Kyle scrubbed it several times with methylated spirts, then several more times with warm water that had super concentrated detergent in it. Kyle had to kind of climb inside it with each rinse (strongly recommend very good breathing equipment for this part, even the detergent stage). It seemed to work pretty well, but we'll be very careful the first time we fire the whole thing up anyway.

We bolted the racking to the inside of the barrel, which was the other part of the whole operation that really had to be totally meticulously perfect (to achieve level shelves) then done! Levelling the racking was a multiple-person job involving several spirit levels and a lot of swearing. I don't have good tips for this because I'm pretty convinced the way we did it wasn't very effective, though if you're in the mood it did occur to us later on that if we'd sat the barrel up vertically we could have done it off a plumb level rather than tried to hold the whole thing flat.
The last part of welding was the Oven Door, which we did last because we weren't quite sure how it was all going to work. This bit took quite a while to work out, so deserves a post all of its own, in Part 2.