Showing posts with label Toilets. Show all posts

Thursday, January 14, 2016

Composting toilet block - part 2

See part 1 here.

Once we had all 9 posts set...


... we added a few more cross pieces to hold it all steady (there was a bit of give in the posts)...


... then started on the roof beams. These were braced with right angle brackets to hold them in place. We arranged them so we had a little bit more roof over the front, where the doors will be. The slope of the roof follows the slope of the hill, which is nice and convenient as then all our posts could be the same length and achieve a nice even slope quite easily.


Then we put in 4 rafters. This involved a lot of sawing and chiselling out of the joints, something Kyle was good at to start with and I like to think I got progressively better at with time.


The rafters were nailed in, and had brackets as well. Our site is quite windy, so we went to the effort to make this really super sturdy so that once it has the cladding on it won't blow around.

Then we painted the whole thing. Kyle used to be a painter/decorator, and is very keen to tell me terrible tales of what happens when people don't paint things properly (it rots). Since we've put a fair bit of effort into our toilet block, we want the additional longevity the paint will give the wood. The paint was cheap at the local hardware store as it had been mixed up to the wrong colour - the people there keep a shelf of mis-mixes for cheaps, and since we didn't really care what colour it was going to be this suited us well.


We were interrupted for quite a while here as the spring rains, pushed along a bit by an apparently extreme La Nina event, just kept coming every weekend we tried to go out there. We even bogged our van one time when we got a bit overconfident on the grassy hillside. We are now pro's at unbogging vans.

Eventually the rain cleared up enough to get the roof on...


... and the walls...


Kyle started panelling the inside with timber offcuts we had collected from the tip over the last few years. I quite like the random, rustic feel of it. The panelling stops all the radiant heat from the metal making the whole place an oven in summer.


Then we went to the tip to get doors. Hanging these was a bit of a team effort, as one of them is officially the heaviest door on the face of the planet.


You'll notice there's a gap in the wall panelling at the top on the back. Since this is the northern side it gets a lot of light so we put a window there! I took polycarbonate sheeting and bent it around the end of the rafters. There's a piece of window ledging underneath, and Kyle put proper window glazing on the lower sill edge so it won't leak in the rain.


At the time of writing this we've gotten a little further and are almost completely done, but I'll put that in a separate post as getting the seats right was a bit technical.

Friday, October 16, 2015

Composting toilet block

One of the first things we want on the property (after our symbolic veggie patch) is a toilet. Seems a no brainer to have a composting toilet, as we'll need to plant lots of trees in a few year's time. This is distinct from the smaller loveable-loo model we hope to have in our house - this structure has not been recognised by the council, though so far as I can tell it's in a legal grey area, and it's for the lead up to and during the build rather than while we're living there (though no doubt it will continue to come in handy into the future).

We've drawn great inspiration from Milkwood Permaculture's 'most loveable loo in the west' with bin specifics, amongst other various people who've done what looks to be about the same thing. We love Milkwood - whenever we decide we need to work out how to do something (build an outdoor composting toilet block, for instance), we set forth onto the Great Interwebs and seem to end up on their blog looking at exactly what we wanted. Essentially, two wheelie bins sitting under a corrugated iron shed of varying fanciness.

My initial (very rough) concept drawings give you a bit of an idea:


The patch of ground where we want to put the toilets is sloped down to the north, so we thought we'd take advantage of the slope to take some height off the building. The bins will be on the northern downhill side, so the chimney for the vents has lots of sun to heat it up and encourage air flow and the ground is naturally lower anyway. Entry will be from the south, up the hill a bit. There will be a retaining wall along the middle of the block, that the bins will butt up against when under the building. That way we don't have to create flooring that supports people's weight, we'll just use pavers from the tip to make a solid, level floor at two different levels (one for the bins to sit on, one for the people to walk on).

Since we have the space, and we're building a structure anyway, we figured we'd make each 'cubicle' big enough that someone could comfortably get changed in them, and have a bit of space for storage of things like extra toilet rolls.

We prepared the bins late one night, just before the shipping container was due to arrive as we knew we'd need them pretty soon.

...


We've got taps on the sides rather than at the back, as the taps protrude a long way and I was worried they'd get knocked on the ground as the bin is being wheeled around if they were on the back. Vents are on the opposite side as that works well with what the chimney for the vents will be doing. We did two bins this first time around, one left hand sides one right hand sides. The bins cost us about $130 each to make up, most of that being the bin itself at $95 from the local big-chain hardware store. We made some expensive choices on things like tap fittings as we want them to last, and we went out of our way to get black coloured bins, but the rest came from the tip.

Out at the property the next day we took the bins along and laid out where we wanted them to go. We'd measured them of course, and had a rough idea of the size of the building, but wanted to mark it out on the slope itself as we didn't have a measurement for that.


We put the bins in place, then sunk star pickets along where the wall above them will go and where the retaining wall will go. Then we cleared the grass from that spot. You can see my pitiful little section on the left being rapidly overrun by Kyle's on the right - he's a lot faster at this bit than I am. In my defence, though, it's not quite as pitiful as it looks in this picture as post of it's hidden by grass in the bottom left of the photograph.

Accuracy didn't matter too much at this stage, as it's just to have grass-free space to sink the retaining wall and the posts that will form the structure onto which everything else will cling. The posts are the point at which proper measurements and making sure things are really square starts to matter. The grass doesn't care if it's square or not, and the star pickets are just our guide for where we needed to clear.


Clearing grass is hard work, but satisfying. Took us about an hour and a half for this bit, with frequent brief stops to check the rain that was looking a bit threatening on the horizon and the nearby cows that were becoming accustomed to our presence and getting a bit curious.

A few days later we returned to lay the retaining wall. We reluctantly bought two new sleepers after failing to find anything suitable at the tip a few weeks in a row. We dug out the downhill section of our little bare square, and settled the sleepers in place.


Then, we dug three post holes. Kyle had already cut the notches for lap joints in the posts. After much discussion we decided to piece the beam together into the lap joints and fix them in place (square) with brackets before we set the concrete to hold the posts upright. This worked quite well, as there were only two of us and we didn't have enough hands to hold everything in place otherwise and make sure it was all square.


We lay drainage tubing on the earthen side of the retaining wall for good measure, then started sinking the downhill posts as well. These were a bit easier, and we ended up doing them one at a time but held in place by a few star pickets sunk into the grass and tied with rope. We hadn't wanted to do this for the middle ones, as it would have meant disturbing our nice firm ground with star pickets just after we'd dug holes for posts.


We ended up with these a bit off square anyway, though not an insurmountable problem. We learned from this and fixed our methods a bit on the other side. Of course, being interrupted by a hail storm doesn't help much - all of this took place over several days.


Once all the posts were concreted in, Kyle got a bit hammer-happy and put up bracing on all the walls. This will be what we screw the corrugated iron wall cladding to later.

At this stage we have 8 out of the 9 posts in (we would have had all of them, except for our hail storm interruption) and all of the structural cross beams are in. The next step is getting the roof beams on, then attaching the corrugated iron walls and roof ($50 at the tip for a big stack of it, what a find). After that it's things like seats, probably some shelves inside, and finding a source of sawdust.

Thursday, October 15, 2015

Waterless Composting Toilet approval

I've mentioned previously that Kyle and I are pretty keen to go with a waterless composting toilet. We've done a lot of research and concluded that building our own is the easiest/cheapest/most reliable path for us to take to get there. We know that for an owner-built model NSW Health does not need to approve our system (this used to be required, but as of 2006 ammendment to the rules, and a later complete regulatory update, NSW Health delegates authority to the local council to approve so long as you aren't manufacturing them). We also know that most people in Australia who have built something similar haven't sought council approval. This isn't an option for us, as details of waste management are required as part of the development application for the house so if we don't succeed with this we'll have to put in a septic system and flushing loo's, which would be a shame. But it means we don't have much to go on about how to actually get it approved.

The Council hadn't had an application for an owner-built WCT before and weren't sure what kind of paperwork to ask for, so we politely suggested we might use the guidelines from the original regulation (from back in 1997) and see how that went.

Given the Council's unsure-but-game attitude we figure there's then a little bit of pressure on us to dot our i's and cross our t's so we don't muck it up for anyone else who wants to do this in the future. If Council has a good experience this time around, and are confident of our ability to avoid risk to the public health, they'll be more likely to look favourably on such applications in future. To that end, I've prepared what I hope is a very thorough application for a Waterless Composting Toilet.

Firstly, what is even required in such an application? According to the old rules:
  1. Plans and Specifications for the proposed WCT (details of which are specified further)
  2. Householder's Reference Manual outlining installation/operation/maintenance/trouble-shooting (the contents of this are specified further)
  3. Placard with basic instructions to be hung on the wall next to the WCT
  4. "Any further information required by the Council" (they haven't yet asked for anything in particular)
After initial approval, there's a process of inspections every few years as well (more forms and money to be paid).

What we wanted to do in the beginning was simply get approval to use a Jenkins-style loveable loo. However, the regulations specifically state that owner-built models must be the owner's own design, and that the health department is aware there are plans available on the internet. So really, if you want someone else to design it for you you have to buy an officially registered model. Since the only officially registered model that even approaches the functional simplicity and published evidentiary basis of Jenkins version is over $900 (which is more than double what it will cost for us to apply for approval and build the thing anyway), and then you have to order specially designed extra buckets on top, we decided to push ahead with a more 'original' version. I've done a lot of research, and have spent a lot of time trying to walk a delicate borderline between existing models that are evidenced to work well (being totally original strikes me as a fundamentally bad idea for this kind of thing) and designing for our particular circumstances and environment as the regulations require.

So, this is what we're sending:


For anyone reading this into the future, I will point out that you cannot use this document in Australia as the basis to put forward your own application (so far as I'm aware - specific local councils might have set up their own regulatory frameworks). The regulations are very specific that owner-built models must be of the owners own design, not simply plans downloaded off the internet (it states this in pretty much those words). This document is intended as an example, because that's exactly what would have been helpful to us to look at before we had to write our own.

At this point various people from the Council have already seen drafts of this document and offered advice, however this has not yet been approved. I've emphasised to everyone we've spoken to that we want to get this right, and whilst we've done our homework and are committed to this pathway we understand there are good reasons why regulations exist and aren't seeking to sit outside of them, just trying to find our way through them. Whilst it's often taken a long time to get answers from them (quite understandable as the questions we're asking aren't exactly run-of-the-mill) they've been reasonably helpful about it all.

I'll post a follow-up when we find out one way or another letting everyone know what the official Council response is.

Monday, April 6, 2015

Toilet Standards

I mentioned previously I'd tracked down a copy of the Australian Standard for Waterless Composting Toilets at the National Library. AS/NZS 1546.2 was most recently updated in 2008.

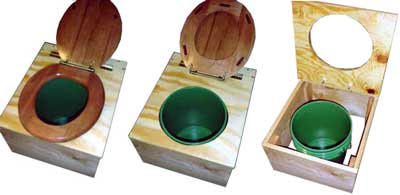
The initial goal was to build a Jenkins-style lovable loo,

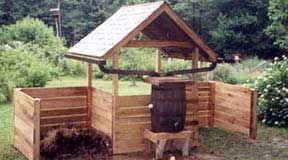
With an associated humanure hacienda.


Because simple is usually best. So, how does this fit with the standards against which we must adhere?

Well, firstly the AS/NZS 1546.2 only seems to apply to manufacturers of waterless composting toilets, not mere mortals wanting to build their own for personal use. Also, upon re-reading the Plumbing Code of Australia the part that refers to WCTs needing to comply with this standard doesn't apply in NSW, where local governments have jurisdiction anyway. One wonders at the point of having a national code at all. This is good, because whilst overall the spirit of the standard implies that the Jenkins model is in keeping with the intentions of the standard, there are a few specific points in the standard to do with limiting possible human contact with the pile that would come down to how people use the system rather than design features.

I'm not sure now exactly which standards we'll be assessed against when we go for approval with the council - potentially only their risk assessment about not contaminating water sources, which I think we have in the bag. We're going to see the Council in a few days for our voluntary pre-development-approval meeting so I will add this to my (rather extensive) list of things to ask them.

Thursday, April 2, 2015

Composting Toilets

A little while back I bought Joseph Jenkins 'Humanure Handbook' to help answer the question of whether to opt for a waterless composting toilet or not.


Almost everyone I found who'd written about reading this one highly recommended it, including me, however it's probably fair to say the audience is likely to be fairly self-selecting.

After reading the book, and checking against various other sources I found about the place, both Kyle and I are pretty convinced that it's a good idea from both a water-conservation and a matter-conservation/soil health perspective. The biggest unknown for us is what it will take to get approval, given that we really have no intention of spending lots of money on a commercial model when we could make one ourselves and have greater control over its function. I know of several other households in NSW who have used composting toilets of the style Jenkins describes, but don't know what they went through to get approval (if they bothered).

So, naturally, I went looking for the rules. The National Construction Code V3 Plumbing Code of Australia (in Section F, Part 1, On-site Wastewater Management Systems) states "The size determination, design and installation of waterless composting toilets must be in accordance with AS/NZS 1546.2". Standard 1546.2 can be purchased from Standards Australia for a little over $200. Considering that construction of a Jenkins-style loveable loo is likely to cost us quite a bit less than $200 we have no intention of purchasing a copy of the standard (which would probably eventually end up making its own deposit in said loo anyway once we were done with it). I've tracked down a copy at the National Library of Australia (conveniently just down the road), which I'll take a look at in a few days.

NSW Health has approval guidelines for waterless composting toilets though it's unclear what relationship they bear to Standard 1546. They predate the Standard by several years so one can only assume they have been superseded by it. The NSW Health rules seem rather restricting of DIY solutions, which is less than encouraging, but they do provide construction guidelines.

The NSW Local Government Act 1993, section 68, puts approval for Onsite Systems of Sewerage Management (OSSMs) firmly in the hands of the local council but doesn't go into any detail about the standards against which approval may be granted. Palerang Council, within which we will likely reside, has information sheets available on the approval process for an OSSM, with a good one detailing the risk factors they check during the inspection stage prior to approval. Palerang's factsheets are quite general, not nearly detailed enough to provide construction guidelines, so we will definitely need to at least skim read the standards.